
WWII Ship Hatch Turned Coffee Table
Each fall, our neighborhood hosts a mass, coordinated garage sale. For one day, fifty-plus families throw their garbage in the yard instead of the dumpster, and people pay them for the opportunity to haul it away. We’ve become garage sale connoisseurs since Hannah came along, because children’s toys a) cost a fortune and b) should not cost a fortune. Garage sales are how we game the system.
This year, Leslie and Hannah were out of town visiting friends during the sale, so I was tasked with finding some trash toys for Hannah.
I came back with a ship hatch.
You know, like a door from a ship. Not just any ship, a World War II-era ship. A Liberty ship. Now, I shouldn’t have to justify this sort of purchase, because (in case you missed it) it’s from a WWII ship, but I knew Leslie might be less than enthused. It didn’t blow bubbles or light up or make creepy laughing noises like the rest of Hannah’s toys. It was actually really heavy and full of splinters. To smooth things over, I picked up a plastic xylophone thing on the way home.

Correction: WWII
A little background
As I hauled my haul home, I fantasized about this hatch’s prior life. I naturally assumed Liberty ships were the unsinkable scourge of the Axis of Evil.

Liberty ship, scourge of the seas.
Turns out they were more like the Chevy Vegas of the allied fleets. They were cheaply assembled, floating tin cans that toted dehydrated foodstuffs and toilet paper. One did sink a German vessel though. So there’s that. Then their hulls began to crack, and a couple blew up in port.
At least it looks cool.
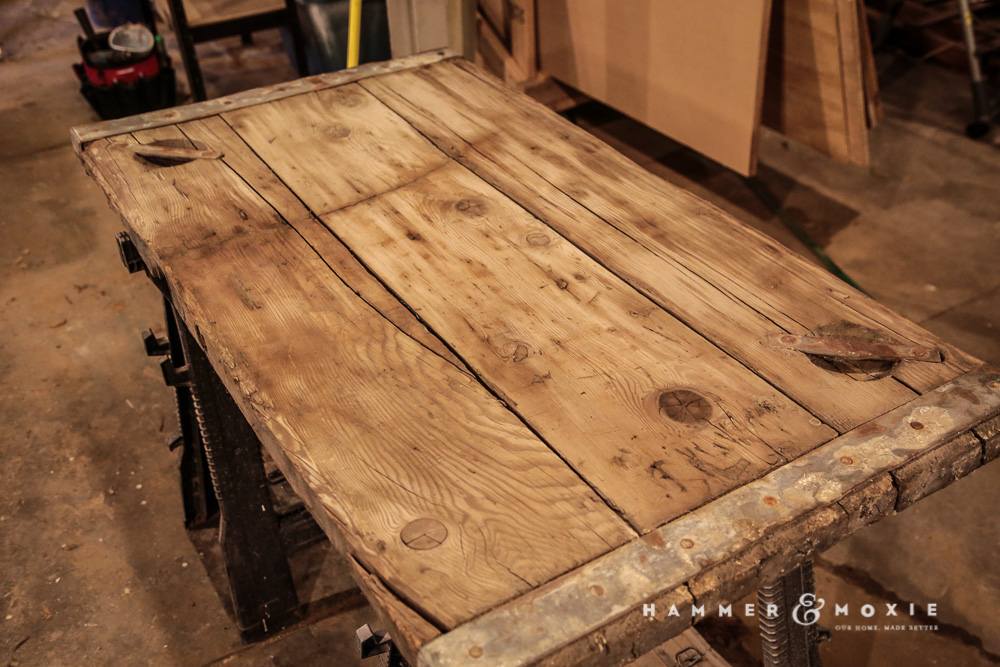
The hatch, full of potential.
From warship to living room
So, what to do with this thing? It takes unique vision to see a coffee table in a ship hatch.
(Does a quick Google query.)
Okay, so maybe I wasn’t the first person with that idea. But if I was going to tread on well-worn territory, I’d at least make this one cool.
Repairs
The hatch—our would-be tabletop—looked like it had been through a war. Which it had.
The grain was split in several places. Aesthetically, these and other blemishes lent the piece character, but it needed reinforcement.
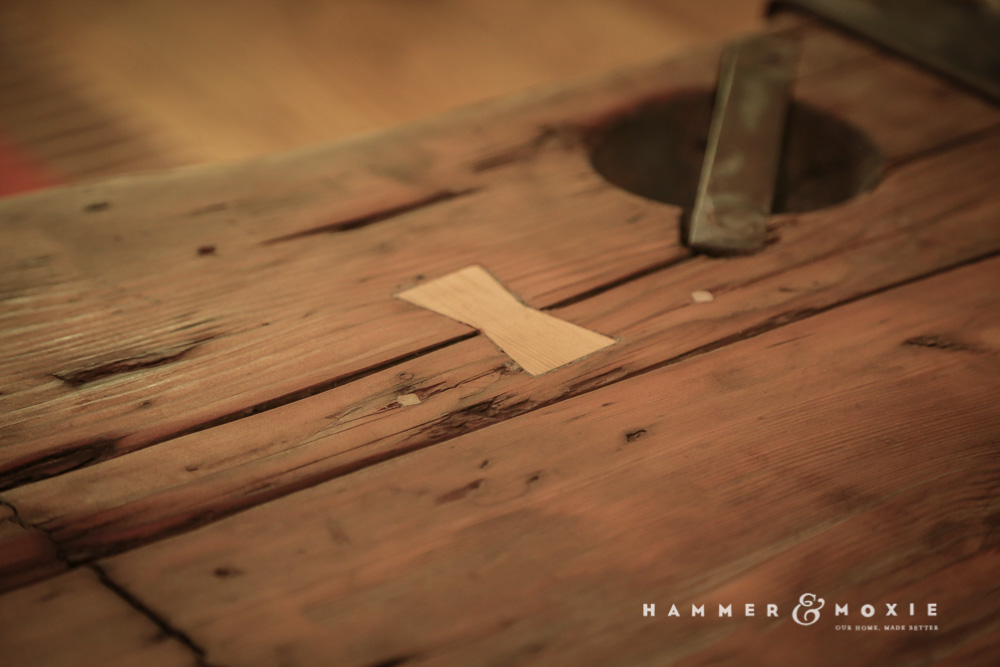
To mend one of the splits, I tried my hand at a couple butterfly joints. Any guesses on what a butterfly joint looks like?
That’s right, a bowtie.
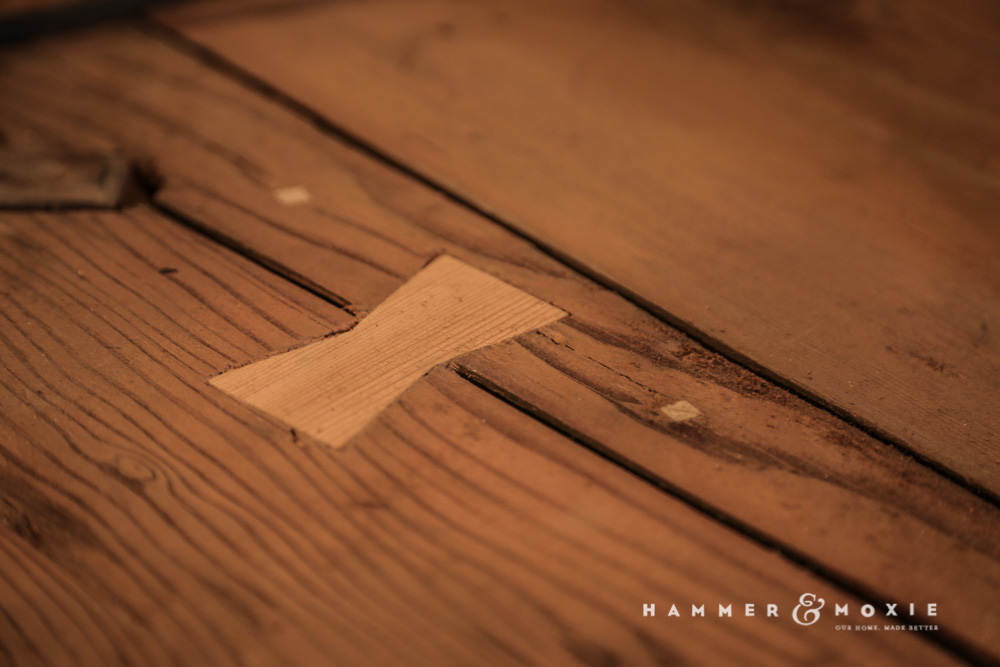
A finished butterfly joint.
Basically, a butterfly “key” can be inserted into the wood wherever a split threatens its integrity, holding the two sides together and preventing the split from growing. It’s an age-old technique implemented as much for its charming appearance as its function.

Rough removal of material with a router.
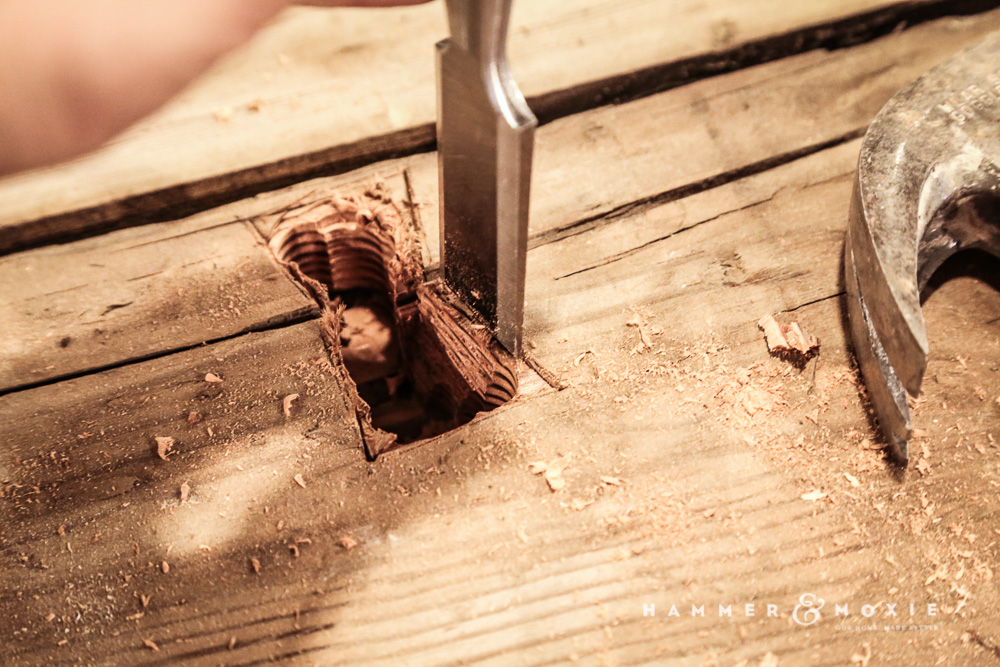
Sides were chiseled little by little with periodic pauses to check fit.
Achieving a perfect fit takes practice. (Incidentally, I need more practice.)
I also used square dowels to shore up some loose pieces.
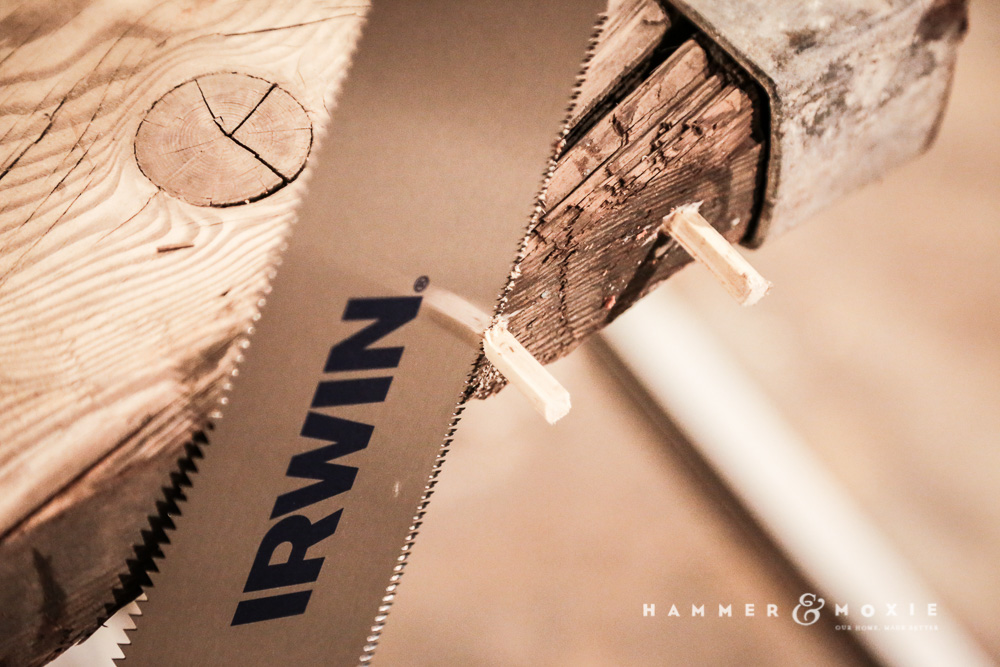
Dowels hold a broken corner in place and add interest.
Ship-Inspired Table Legs
The biggest question: what to use for the legs? It had to be cool. It had to be unique. Nautical, but not too nautical.
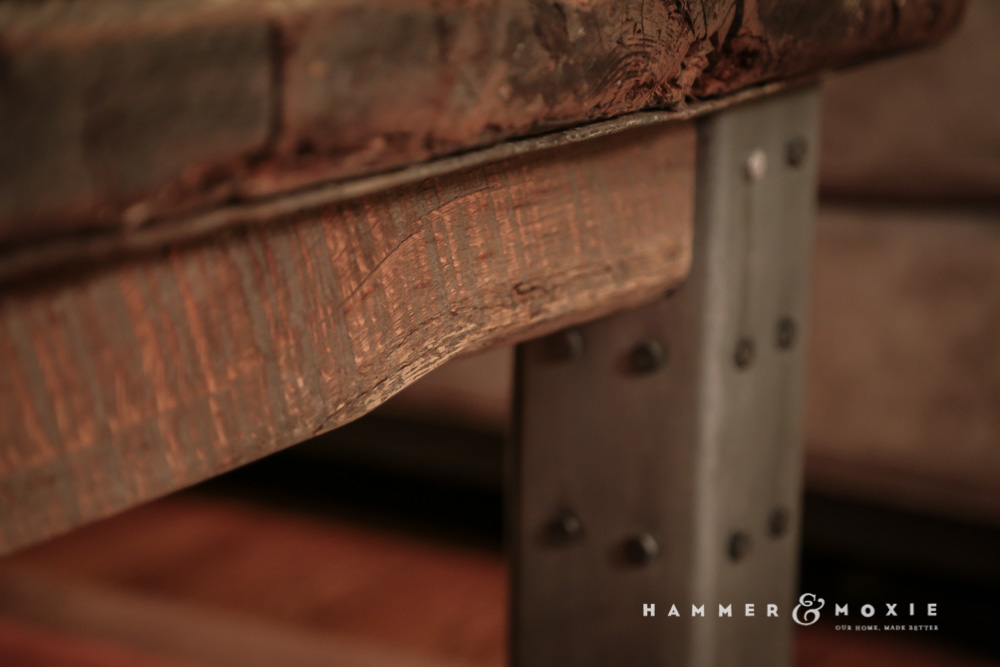
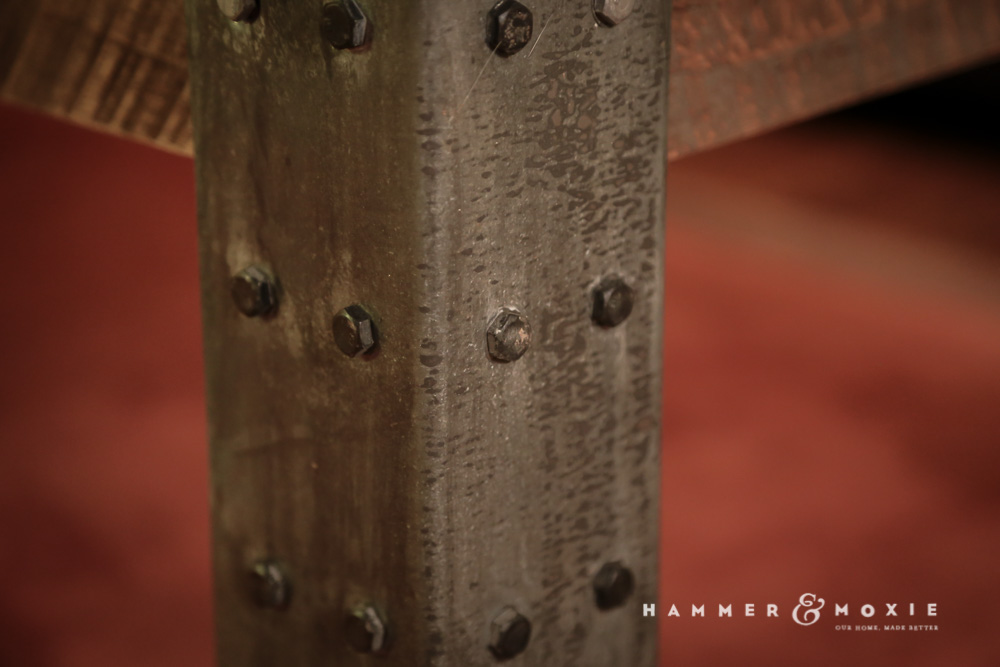
I drew inspiration from a riveted ship’s hull and wrapped 4″x4″ wooden legs with sheet metal and mimicked rivets with uniformly placed lag bolts.
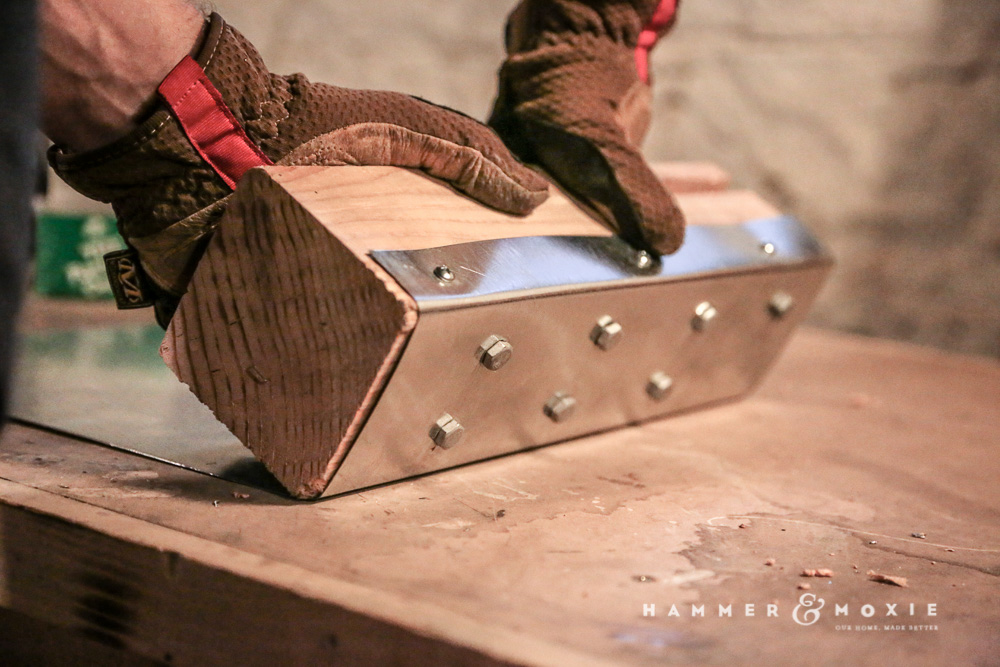
Wrapping legs with sheet metal.
But, I couldn’t just plop the weathered ship hatch atop these awkwardly shiny appendages. They needed to match the metal on the hatch itself.
To achieve a comparable patina, I picked up a gallon of muriatic acid at Lowe’s to etch and age the legs. This is where I’d be remiss not to say something that would make my lawyer father-in-law proud: if you want to experiment with muriatic acid that’s fine, but I sure as heck didn’t tell you to. Seriously, it’s scary stuff that’ll blind you, melt your lungs, and burn your skin off. I’m pretty sure “Dip” is its street name. If, of your own volition, you decide to play with muriatic acid, be prudent, and wear safety gear (eyewear, chemical gloves, a mask, etc.).
Back to the legs: I sprayed the muriatic acid on the legs, and within a minute or two it began to etch the steel and darken the zinc-plated bolts.
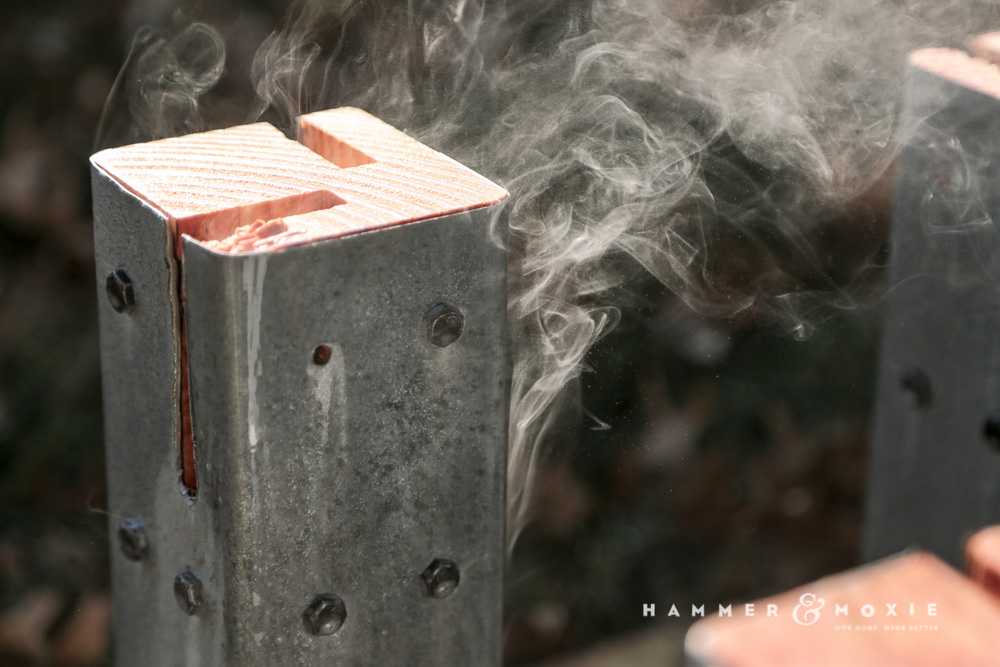
Muriatic acid ain’t no joke. If it smokes when touches steel, imagine what it would do to your skin.
I sprayed and rinsed several times and then left them outside in the elements for several days. The shine was gone and a nice patina achieved, with no two legs looking exactly the same.
In fact, one of the legs got a little carried away:
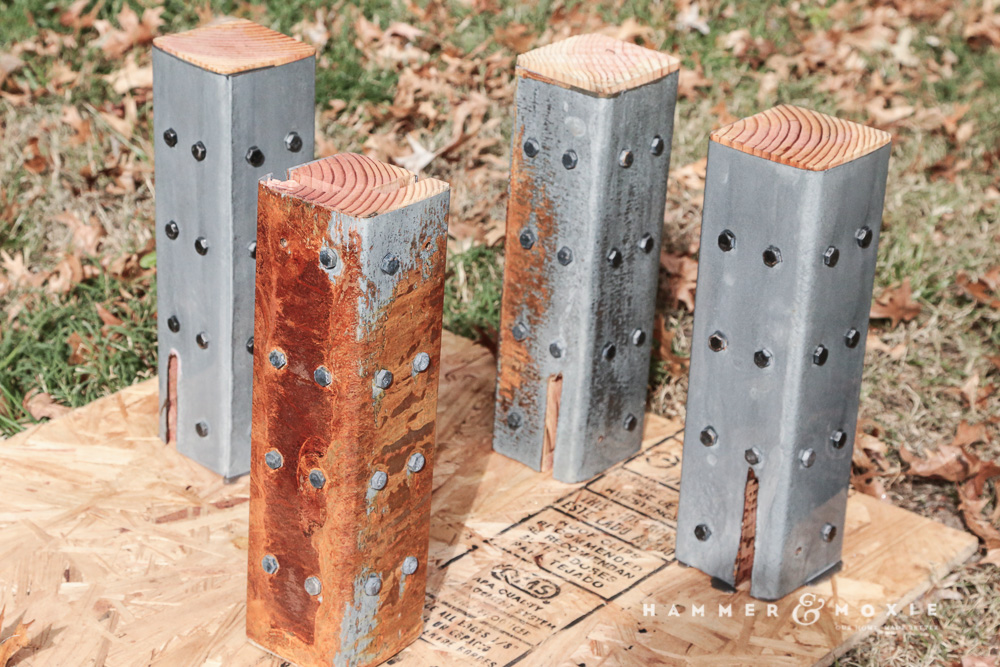
Excess rust was easily removed with steel wool.
I cut aprons out of some reclaimed oak that had been exposed to the elements and thus matched the look of the hatch nicely, and I joined them to the legs with mortise and tenon joints. Mortises are basically slots cut into wood, and tenons tongues that are cut to be inserted into the slots. A properly cut joint can be held by nothing more than wood glue and is much, much stronger than a joint held by, say, pocket screws.
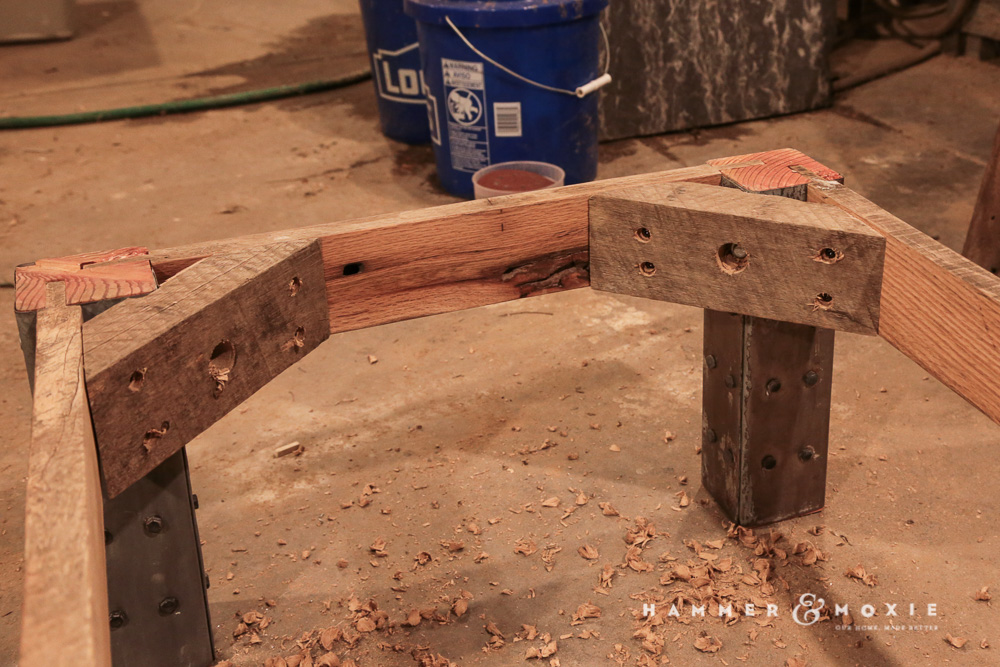
Legs and aprons, joined by mortise and tenon joints and corner brackets.
I sanded the surfaces smooth, finished the wood with tung oil and the metal surfaces with satin polyurethane. Tung oil soaks into the wood (rather than sealing the surface), bringing out the grain and giving it a warm, rich appearance. It doesn’t add a glossy sheen—a look that I wanted to avoid on this rustic, historic piece. It’s not as protective as, say, polyurethane, but that’s okay. I want it to continue to patina. I look forward to the stains and rings the table will accumulate over the years.
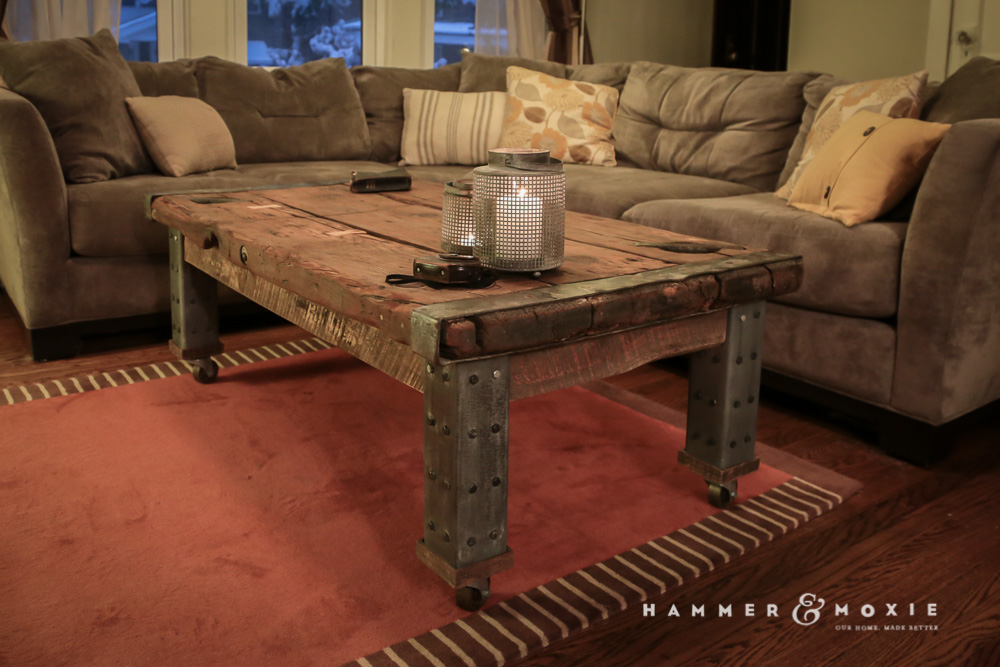
Finally, I mounted the tabletop, added metal casters to the legs so that Leslie can move it aside to vacuum (her favorite hobby), and now we have us a piece of WWII memorabilia that hope will serve us better than it served the U.S. Navy.


16 Responses
I was just handed down my grandfather’s hatch cover, and I’m starting to work on the restoration. Do you have any advice on the metal brackets, screws, and handles? I’m considering sandblasting, but il having trouble with the handles and bolt that goes through the width of the table.
So sorry for the delayed reply, Kyle. I didn’t want to remove all the patina, so I just used a wire brush to knock off some of the loose rust. I’ve found a wire brush drill attachment is perfect for that sort of thing. A wire brush on an angle grinder is too aggressive, and of course brushing by hand works but takes longer. One of those cup brushes on a typical cordless drill is a happy medium.
You had said the hatch was splintery, did you you sand it as well? And if so, how did it retain it’s weathered look? I have some old shelves that give me splinters every time I touch them but I don’t want to sand them because I love the way they look. Any advice?
I did sand it pretty well, and it’s been surprisingly un-splintery as a table. But the hatch had so many splits and imperfections that even after sanding, it retained plenty of character. I’ve used old wood elsewhere that was pretty rough and had details like kerf marks from the sawmill that I didn’t want to sand out completely. In those situations, rather than starting with a really coarse grit to knock everything down to a uniform surface, I usually start with a finer grit—in the 80 to 220 range, depending on how rough the piece is and how much material I want to remove. That allows me to remove some (not all) of the roughness, leaving some of the details in tact. If you’re working with fine sandpaper, you can easily keep an eye on your progress. It’s hard to go too deep too fast. Also, I’ll often use a knife to remove large splinters from the corners/edges and then sand lightly. The knife gives the edges a manual, imperfect appearance, which is sometimes a desirable look.
Thanks, I’ve always wondered what to do about the shelves, I’ll definitely give that a try!
I have two Liberty ship end tables, one large coffee table, all in beautiful condition, even trimmed off with thick marine cable.
How would be the best way to sell them?
That’s a great question, and I’m really not sure. A venue like Etsy would seem to be perfect for handcrafted/repurposed furniture, but I know from experience those hatches aren’t light, and you’re likely to spend a small fortune on shipping. If you do go the online route, I understand Greyhound has extremely cheap freight shipping rates, but you have to drop it off at a station, and the recipient has to be available to pick it up upon arrival.
Or, perhaps you could find a local shop with similar wares who would be willing to sell it on consignment?
And, of course, there’s always Craigslist for local sales, but that’s a crapshoot.
All good suggestions, thank you very much.
Wish there was a way to post pictures of them, artisan that you are, believe you’d really appreciate the workmanship (or “womanship”) of these pieces. And you’re right, they are quite large and very heavy. Hence, because I am in the process of downsizing, they need to find a new and larger home. Will steer clear of Craigslist.
Thank you,
Judyann
Hi Judyann,
If you live in the Northeast and still have the hatches available, I would be interested in them.
Nancy
Absolutely perfect! Are you interested in selling your work of art?
Hey, thanks! Compliments are my favorite. Alas, I worked to hard on this one to part with it, but thanks for reaching out.
I’ve been holding on to my ship’s hatch for a while, I finally found my inspiration. Thank you!
Glad to hear it, John. Good luck!
Very good, innovative, I like it! I did something similar a couple of years ago using a small (but very heavy) oak door that was about 100 years old (so I’m told). The door was made from 5 vertical slats that were dovetailed together and held with two horizontal struts top and bottom.
Very impressive!!