
DIY Wood Privacy Fence with Accent Lighting
Last year, we built a privacy fence at Leslie’s old house (at the time a rental property) to keep the neighbors’ brood of urban chickens at bay. On a deadline, but hoping to avoid mid-July heat and humidity, we picked a late-August weekend. It was 105º.
This year, we built a privacy fence at our house. Once again on a deadline and hoping to avoid the July heat, we picked a week in late August. It was 104º.
Darn it all.
Hanging rails and pickets is one thing, but that day of setting posts—digging, cutting roots, and hauling concrete in the sulfur-and-brimstone-tinged Missouri air hasn’t faded from our memory. So, we paid Tom to set the posts this time around. Tom is handyman and carpenter and a very good one at that. So he kindly dug holes to hell for us.
Demo

The old fence—a 3″ chain-link fence—wasn’t too bad to remove. Although, for reasons unbeknownst to me, one of my neighbors requested I leave his section up. So now, rather than an ugly, leaning, chain link fence, he has an ugly, leaning, chain link fence next to a brand new wooden fence, with a 3″ weed farm in between. At least I don’t have to look at it. To each his own.
Anyway, demo. Disassembling a chain-link fence takes minutes and is fairly intuitive. Removing posts set in concrete is a bit more challenging, but I found most could be removed by digging a 2′-deep hole immediately adjacent to the post, and then tipping the post into the hole. Sometimes the clay soil around the concrete was packed so tight that I’d have to continue digging around the post until it came loose, but I rarely had to dig all the way around. Hopefully that trick will save you some time.
Installing wood fence posts
If you remember one thing, remember this:
Water is the enemy.
If a wood post contacts the soil, or if water is allowed to pool around the base of the post, it will rot. Probably faster than you think. As far as wood posts go, you have two options: cedar or pressure-treated pine. Even if you opt for pricier cedar rails and pickets, I understand pressure-treated wood to be better for ground-contact situations, as it’s pumped full of caustic chemicals, and we humans excel at combating nature with the most unnatural methods we can muster.
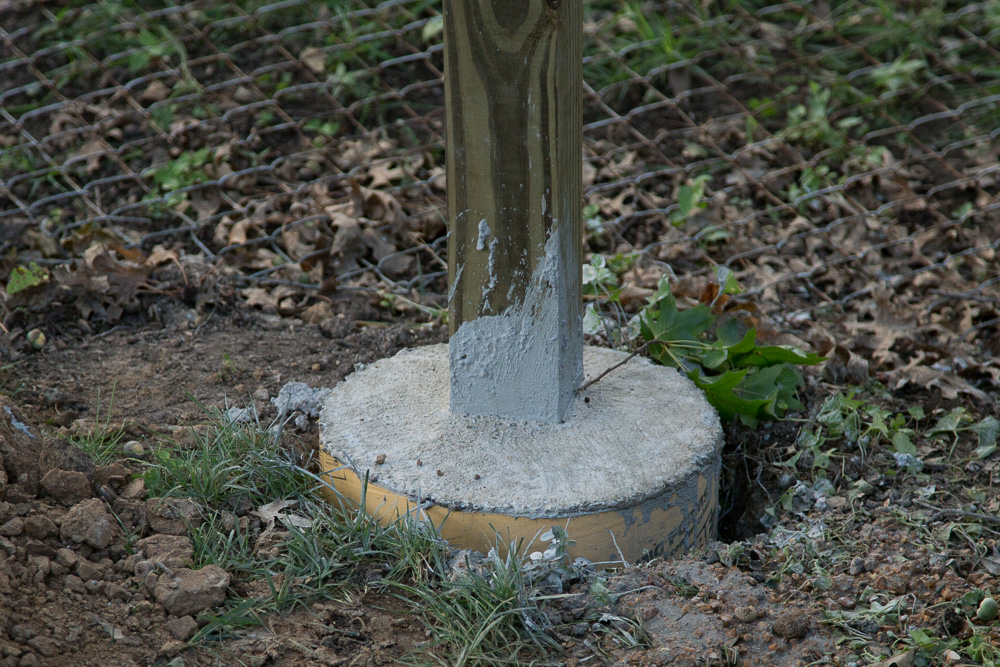
People who are really into fences like to argue about whether you should set posts in gravel or concrete. Gravel allows for quick drainage (good), but concrete offers more rigid support (good). I think a hybrid makes sense: fill the bottom of the hole with a few inches crushed rock or pea gravel, position the post, add another inch or two of gravel, and then fill the rest of the way with concrete to above soil level. The concrete forms a more solid pier than gravel, but as wood expands and contracts seasonally, a gap is bound to form between post and concrete. But with a gravel base, any water that enters that gap can drain out the bottom.
Posts must reach below the frost line, which in Missouri is about 30″, so our holes were 36″. Holes should be triple the width of the post. So, for our 4″x4″ posts, our holes were 12″ in diameter.
Tom used 12″ lengths of concrete form tubes to bring the concrete to a few inches above ground level to ensure water wouldn’t pool around the base. Gold star for Tom.
Fence rails & preparation for accent lighting
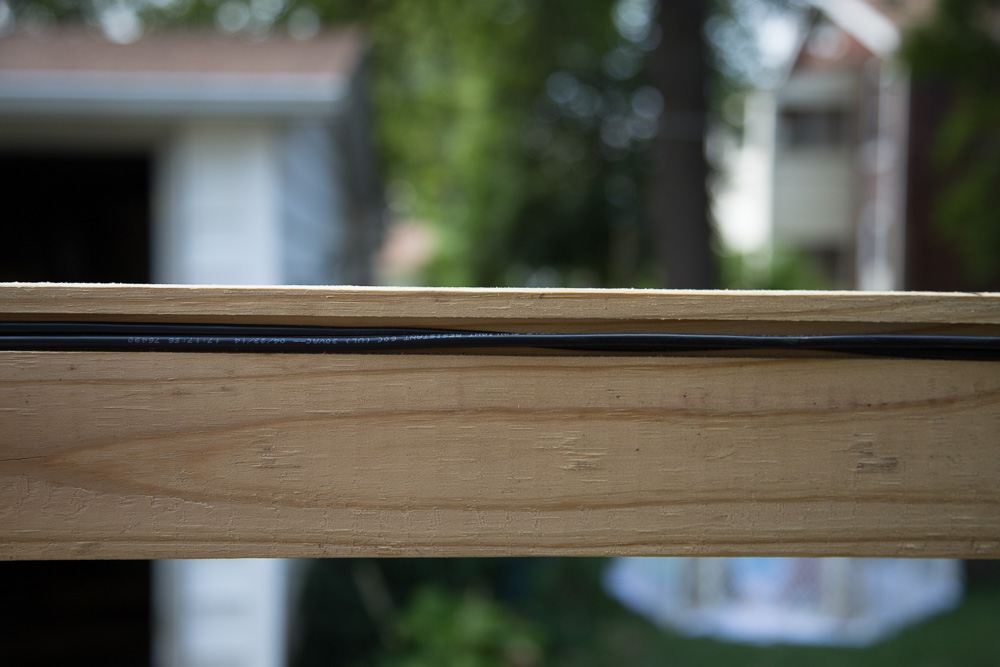
I helped a friend install lights on his privacy fence and liked the idea so much I decided to rip it right off. In order to run the cable inconspicuously, using my table saw with a dado blade, I cut a 1/2″-wide, 1/4″-deep channel the length of each top rail. This would allow me to recess the landscape wire in the top rail so that it could be concealed with pickets. Note that I made the notch near the top of the 2″x4″ leaving plenty of room to nail in the middle without fear of damaging the wire:
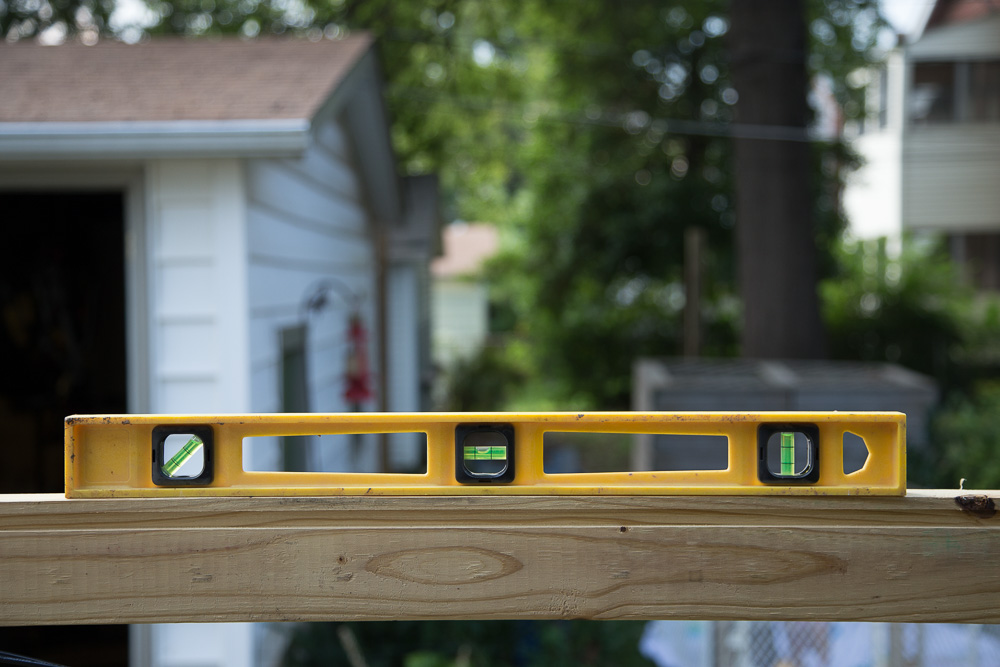
 Since our yard has very little slope to it, we opted for a level fence top rather than following the terrain, giving it a clean, uniform look. (A level top may not be possible if you have a significant grade in your yard.)
We were feeling a little guilty about erecting a wall between ourselves and our perfectly genial neighbors, but since the grade of our yard falls off approximately a foot from house to alley, we were able to trim the pickets to 5′ near the house and leave them a full 6′ by the alley. So, we could peek over the 5′ section to say hello (and alleviate our consciences) while fully screening the used mattresses that seem to permanently clutter the alley.
To achieve a level top, it was important that the top rail be hung correctly, as everything else would be based off that.
So, we started at the house, measuring and marking the corner post 5′ from the ground. This would be a our picket height. We measured down from that mark about 6″, giving us our top rail height and starting point.
We used 16′ 2″x4″s for most of our rails, which spanned two sections each. This made for fewer cuts and, in theory, extra support (fewer joints). Our post spacing wasn’t always perfect, so we measured each one and usually had to trim a couple inches off the rail. We nailed the first end to the corner post beneath our mark and checked for level before nailing the other end:
Note that the channel faces out, where the pickets will go.
We continued this process around the entire fence. For the middle and lower rails, we just cut a 2′ length of scrap 2″x4″. We used that to keep the distance between rails uniform so that we wouldn’t have to check for level like we did on the top (hence the need to get the top rail level). We staggered the middle rail so that the joints wouldn’t be on the same post as the top and bottom—sort of like how bricks are stacked to avoid having one, continuous joint.
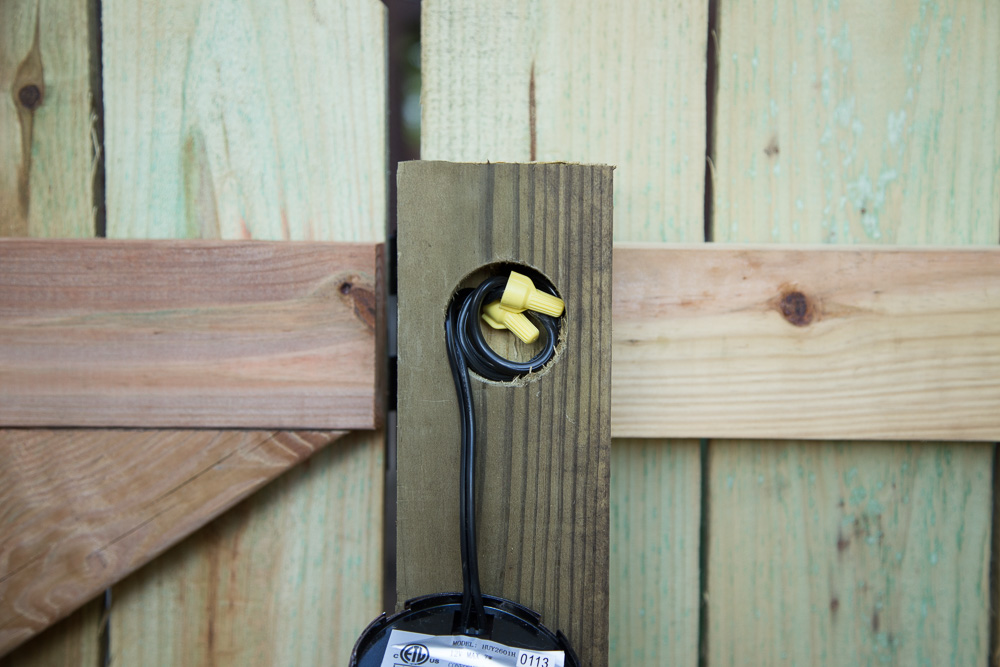
Before running cable for the lights, we drilled holes through each post. We drilled a 1/4″ hole from the channel in the top rail all the way through the post. But we also needed room in which to coil the 6″ of extra cable behind the light. Using a 2″ boring bit (a paddle bit would also work), we drilled from the other side about 2″ deep. Since landscape lighting is low voltage, the wires could be connected and coiled in that 2″ hole without concern for fire or injury.
We ran wire from post to post, pulling one end through the hole, leaving and cutting about a 1′ tail, then running the next section of cable back through that hole along the rail, and out the hole in the next post, and so on.
We trimmed posts to below picket level with a circular saw.
Intermission
House projects with a not-even-one-year-old are particularly challenging. When building a fence, you must build a second fence for your child:
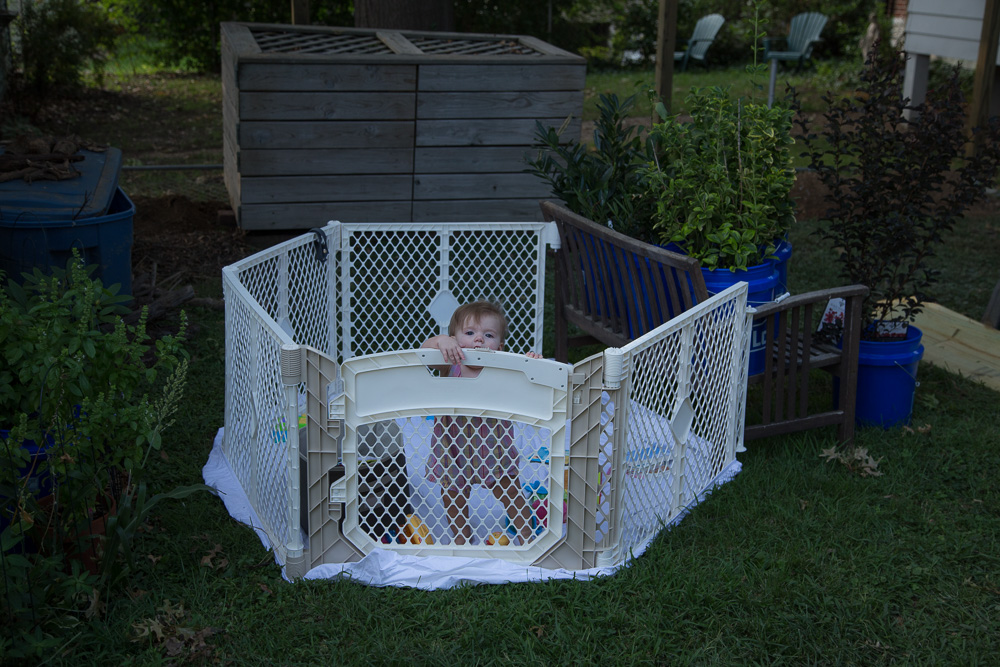
Hannah’s cage.
And water breaks tend to coincide with meltdown breaks:

Time for a break.
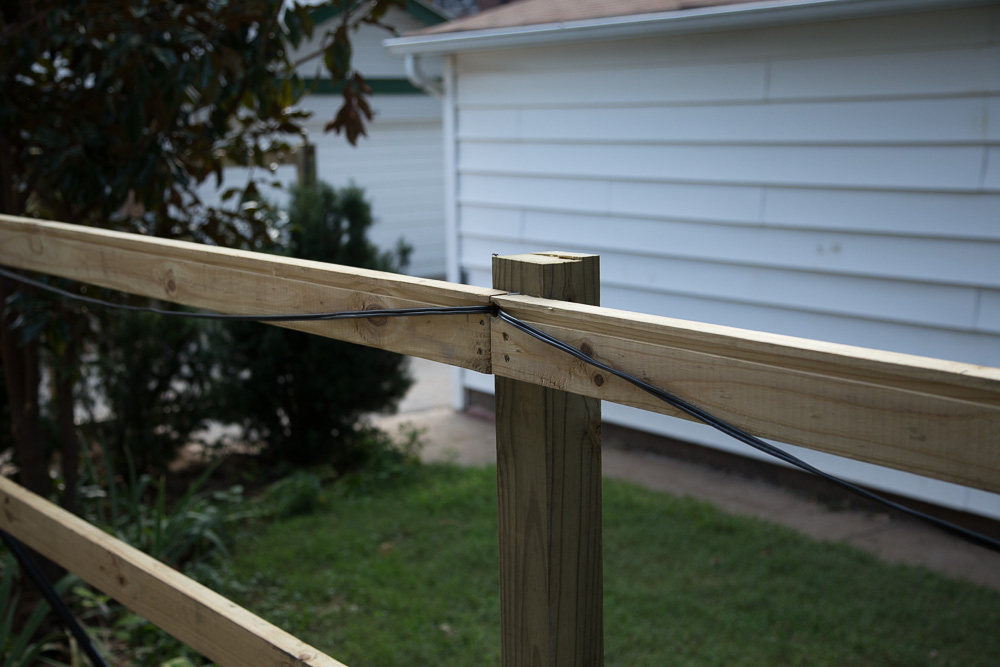
View from the picket-side of the fence. The wires are slack but will fit into the channel as pickets are hung.

View from the inside of the fence.
Hanging fence pickets
It doesn’t get much easier than hanging pickets. We cut 5″ or 6″ spacer that we placed on the top rail to use as a height guide while hanging pickets.
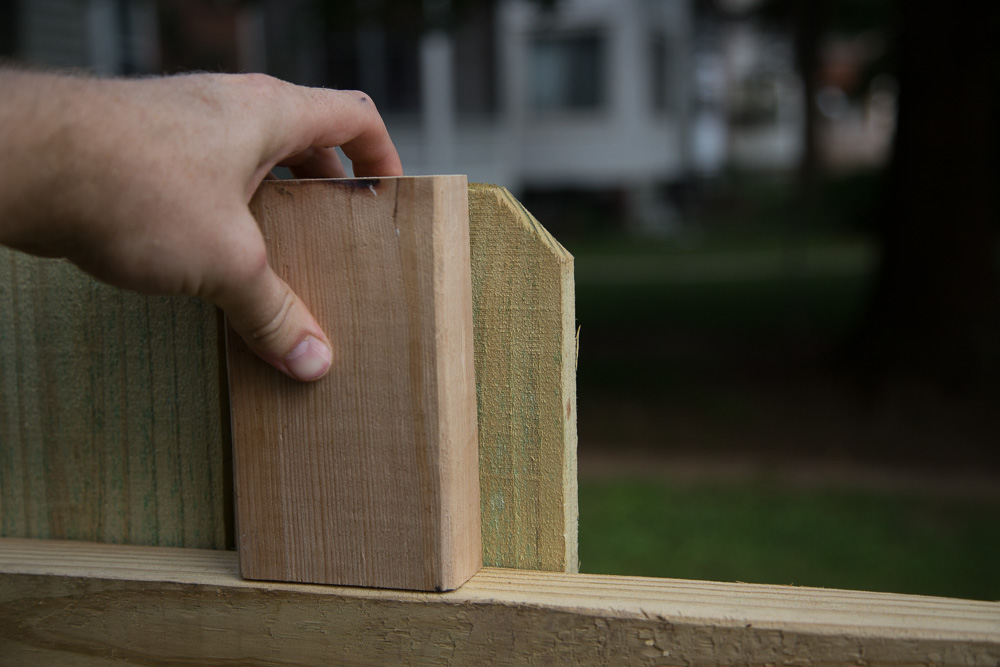
A spacer provided an easy way to ensure the picket tops remained level.
There’s not much of a science to keeping pickets plumb, because the lumber tends to be imperfectly cut or warped. I recommend checking plumb every half-dozen pickets and adjusting your next few pickets accordingly. As long as you check plumb semi-frequently and make adjustments, the eye shouldn’t be able to detect any imperfections.
Keep in mind that your pickets are likely to contract, especially if they’re pressure-treated and still saturated. That’s to say you don’t need to install them with much of a gap, as a gap will form.
Given the level top of our fence, we had to trim the bottoms of the pickets to follow the terrain. We measured and made cuts six at a time.
Building a Fence Gate
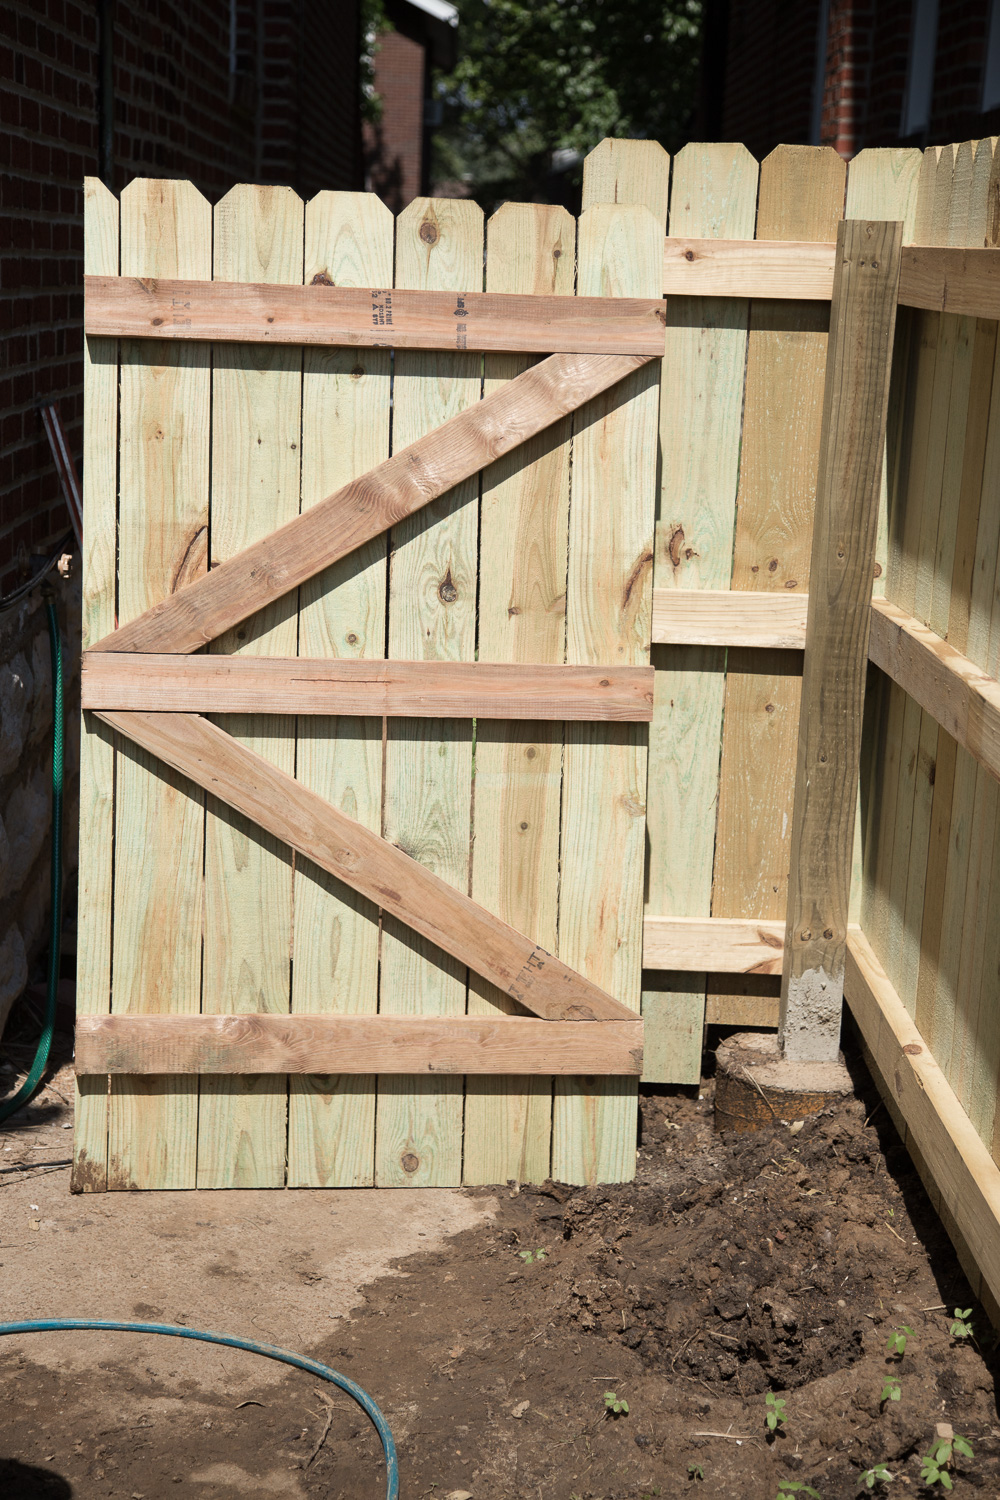
You’ve seen those sagging gates, once a proud rectangle, now a sad rhombus. Properly positioned diagonal supports are important to ward off such a fate. In our case, I configured the diagonals to create an arrow pointing towards the latch-side of the gate. Alternatively, and more commonly, one diagonal brace extending from the bottom hinge-side to the top latch-side would work.
We cut and assembled the rails and diagonal supports on a flat surface (our garage). The vertical pieces you see below are spacers cut from scrap wood that we used to ensure the rail spacing was consistent. (Note, most gates have vertical 2″x4″ sides as well, but I figured they add more weight than support, so I omitted them. I’ll update this if that proves to have been a huge mistake.)
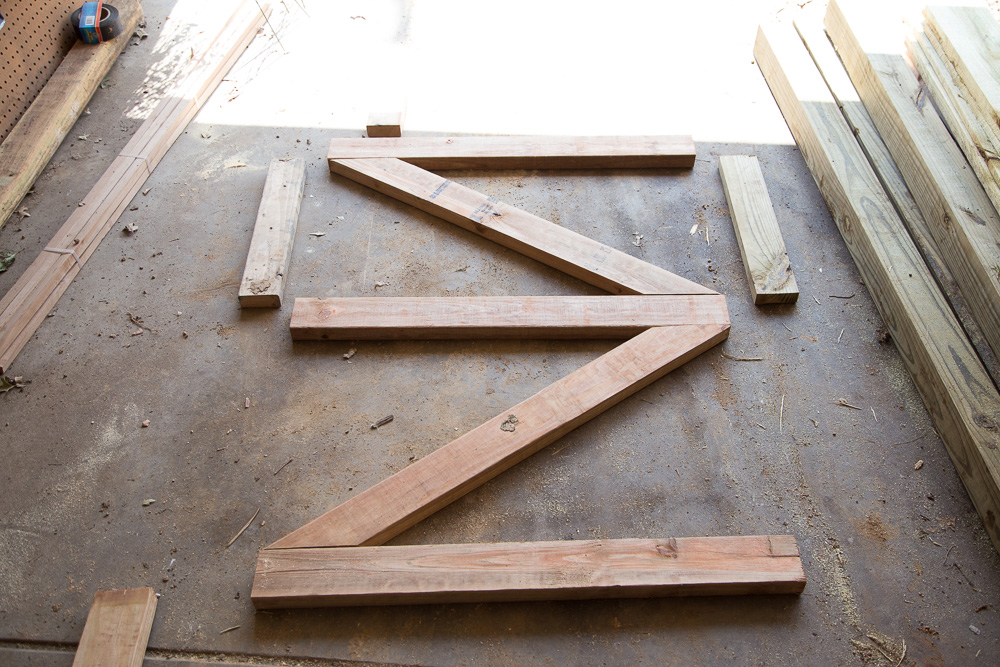
Left=hinge side, right=latch side. The two vertical pieces are scrap pieces cut to ensure the spacing is uniform.
Next, we positioned the outermost pickets and nailed only one nail into each rail so that the shape of the gate could still be manipulated.
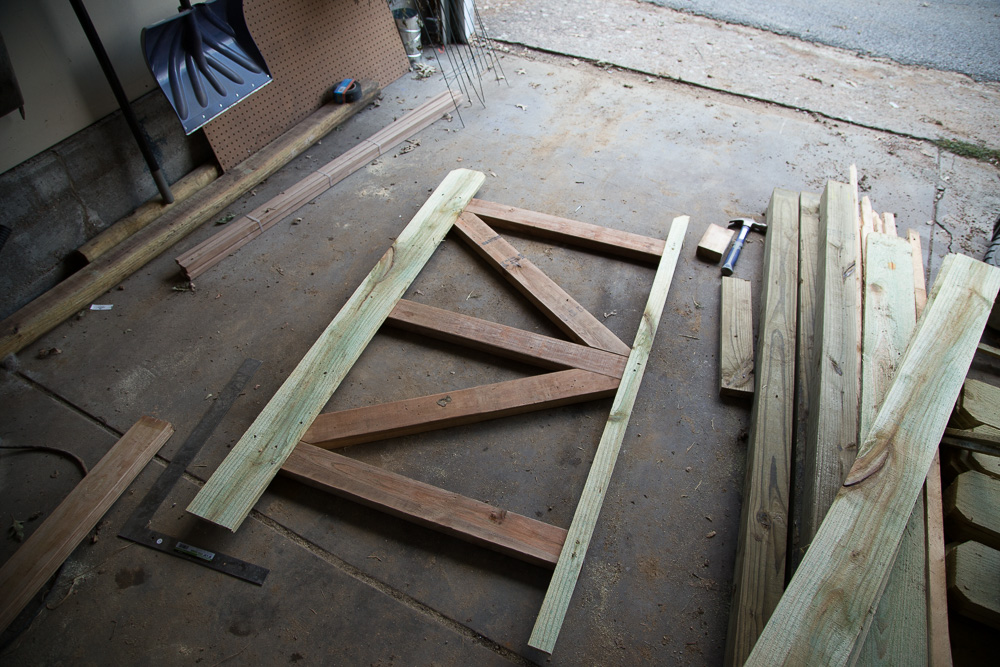
We measured diagonally from corner to corner, each direction (upper left to lower right, upper right to lower left). When those measurements were equal, we knew the gate was square. We had to manipulate the gate a bit until the measurements both measurements were 61″, and then we added another nail to each rail to hold the shape.
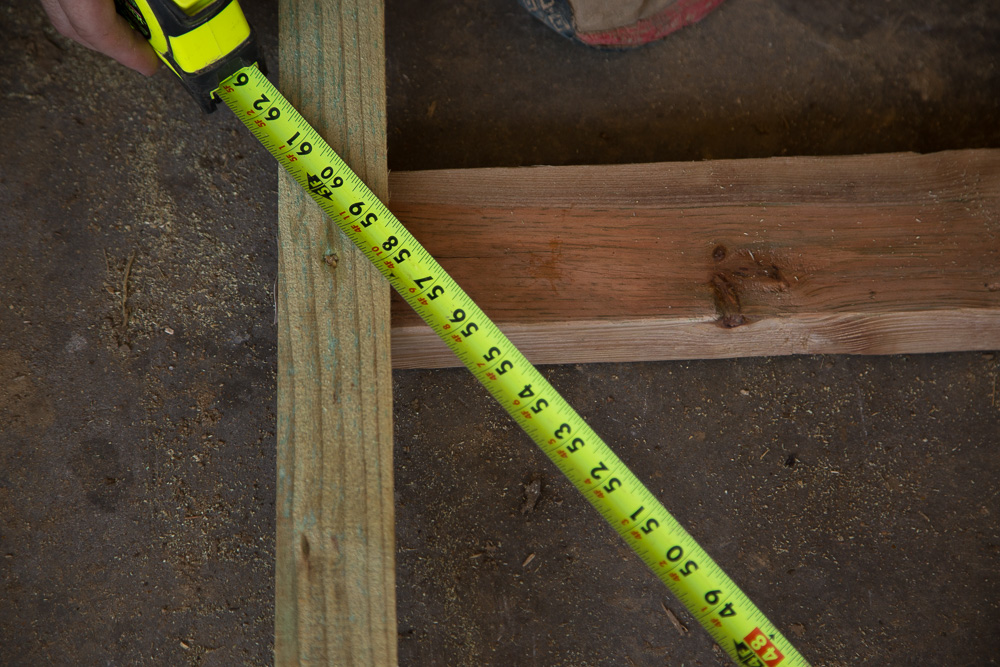
Checking for square. If the other diagonal is 61″, this gate is square.
And finally, we nailed the remaining pickets in place.
Ready to install.
We hung the gate with a 1/2″ gap between it and the fence.

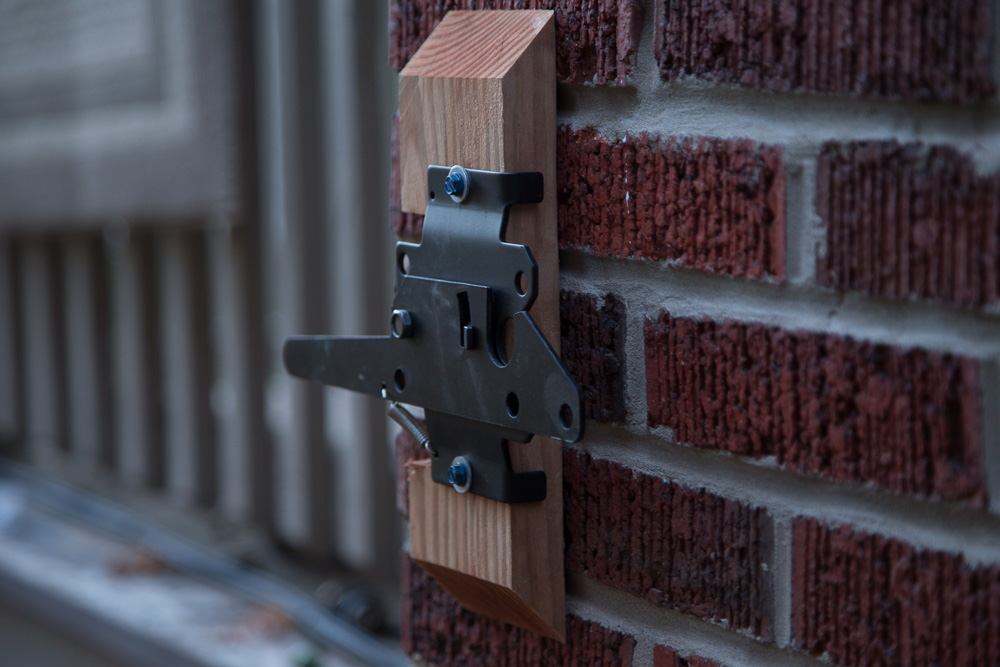
And we mounted the latch directly the the adjacent structure, in this case the house, using a 2″x4″ block.
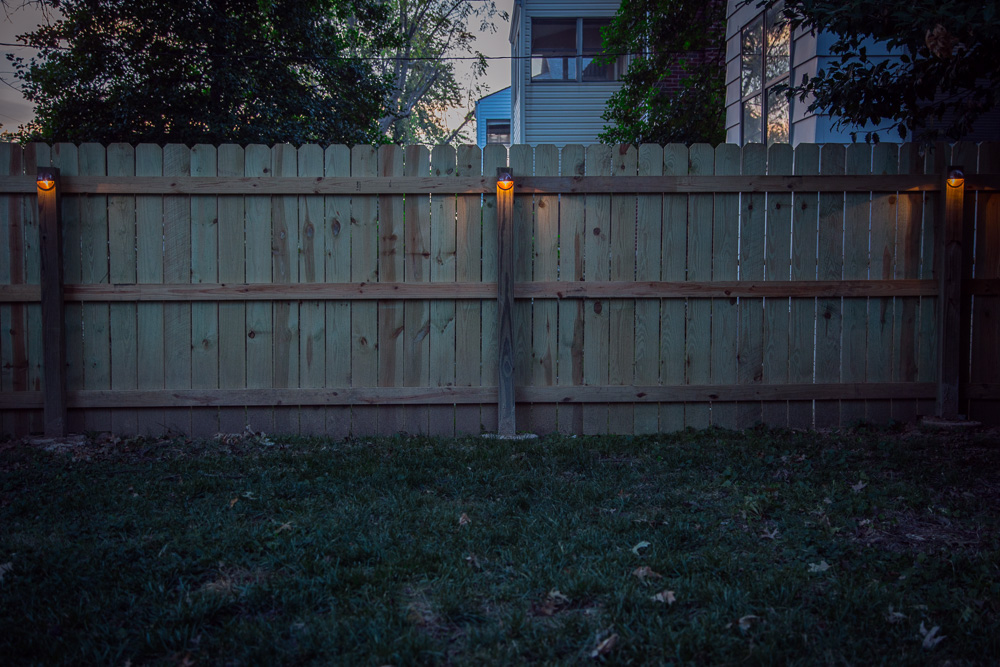
Accent Lighting
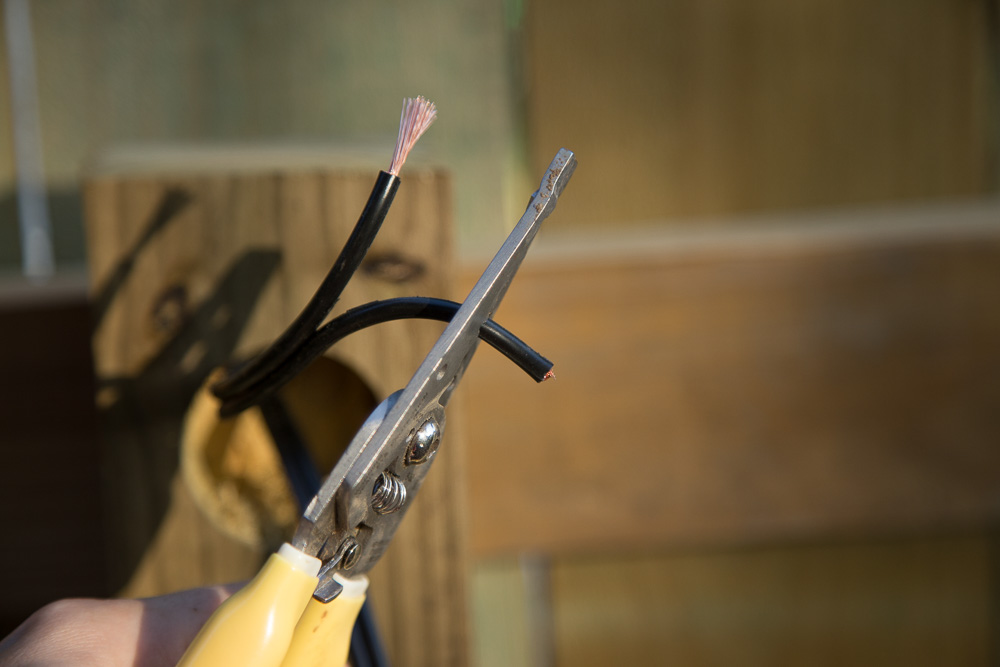
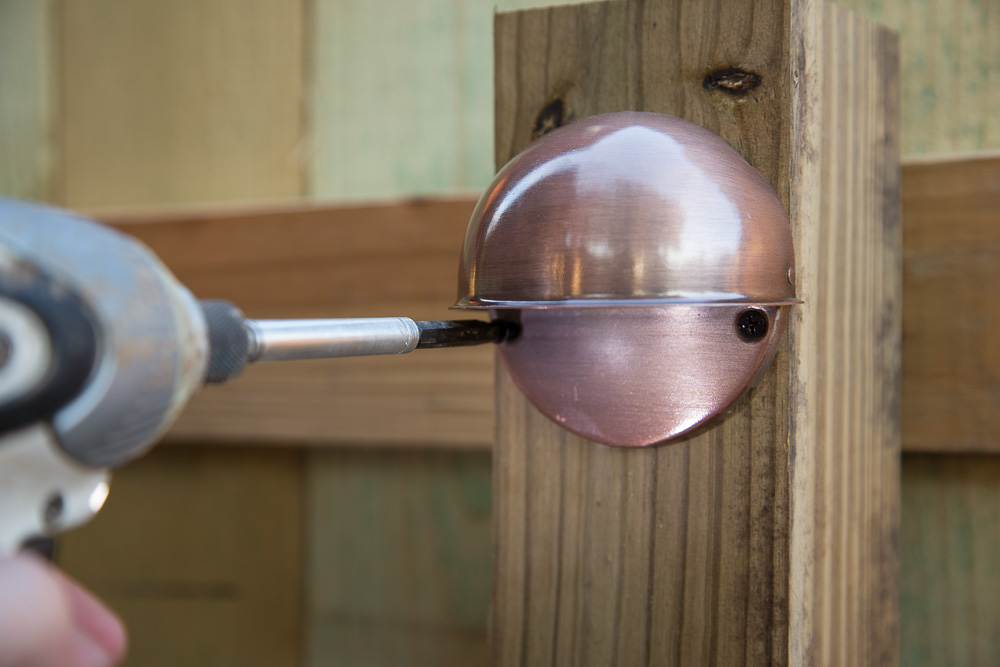
Finally, we installed a deck light on each post. We trimmed all wires to about 6″ and stripped about 1/2″ off the ends.
We made connections with wire nuts and coiled them into the holes.
Then we mounted the lights. Take care not to touch halogen bulbs with bare skin. Apparently oils from the skin can shorten bulb life considerably. For reasons unfathomable, this is not printed clearly on halogen bulb or landscape lighting packaging.
A landscape lighting transformer converts power from 120V to a safe 12V. It must be plugged into a GFCI-protected switch with a wet use cover.
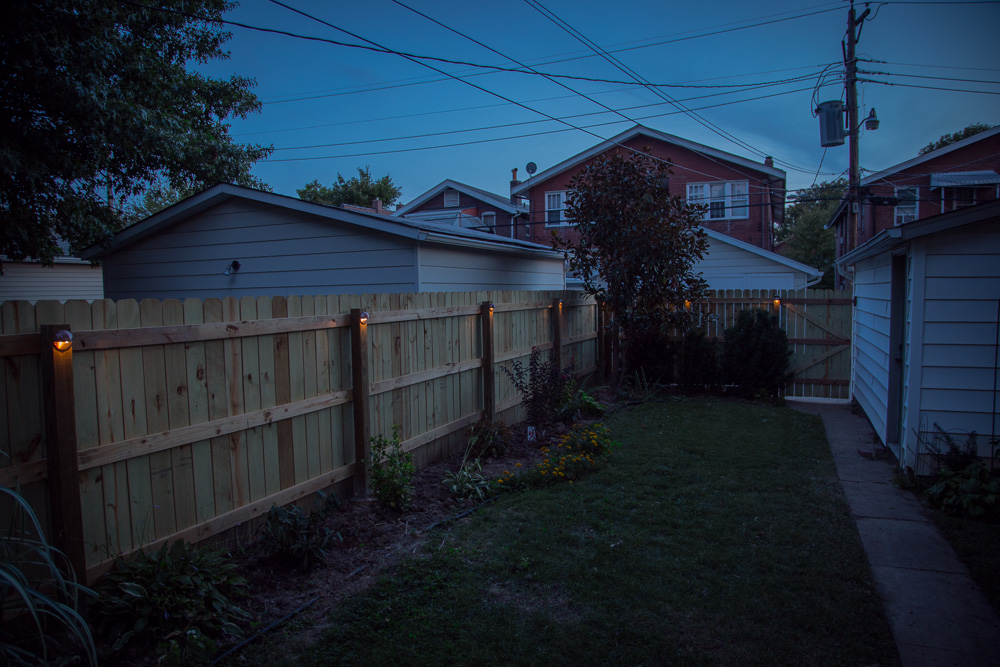
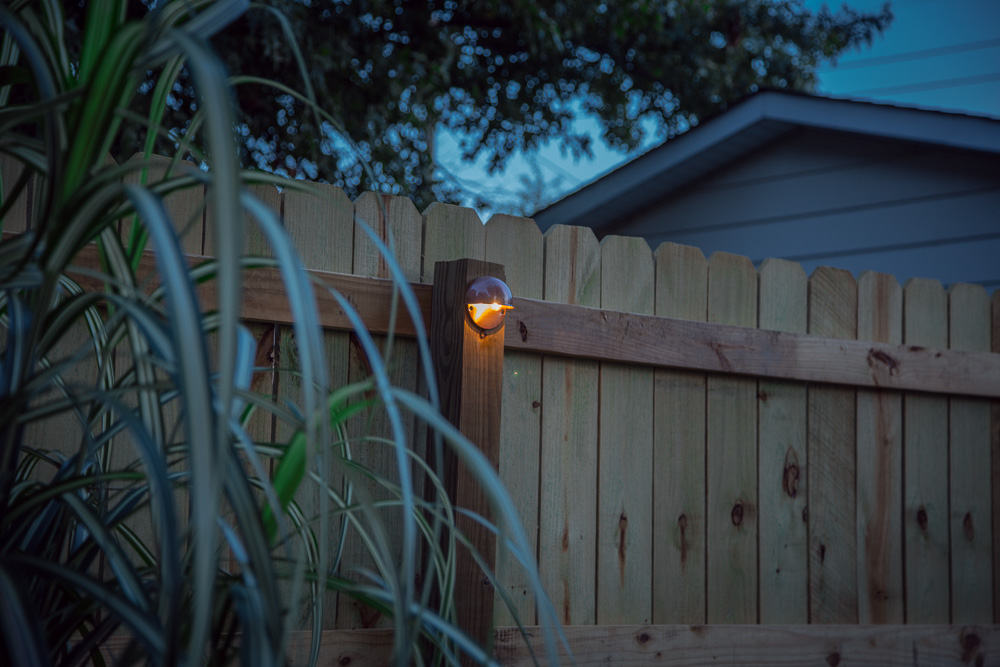
The reveal

Budget
| Item: | Cost: | Source/Brand: |
|---|---|---|
| Lumber | $1000 | Lowe’s |
| Concrete | $540 | Lowe’s |
| Pea Gravel | $72 | Lowe’s |
| Accent Lighting, Wiring & Transformer | $363 | Lowe’s |
| Nails | $75 | Lowe’s |
| Gate Hardware (2 Gates) | $75 | Lowe’s |
| Labor* | $925 | (Set Fence Posts) |
| TOTAL: | $3050 |
*If setting posts yourself, assume about a $75/day rental fee for two-man auger.